Looking at a sewing pattern, you may wonder at the many instructions, markings, and drawings you will find there. Before you can start any stitches on your fabulous fabrics, you have to understand first how you are going to cut them. There are many signs and symbols to focus your eyes on.
List of Contents:
What do arrows on sewing patterns mean?
The arrows on sewing patterns are directional symbols. They provide instructions on how to layout your pattern pieces on the fabric. Some examples of directions indicated by the arrows are along the grain, against the grain, on the diagonal or in the direction of most stretch.

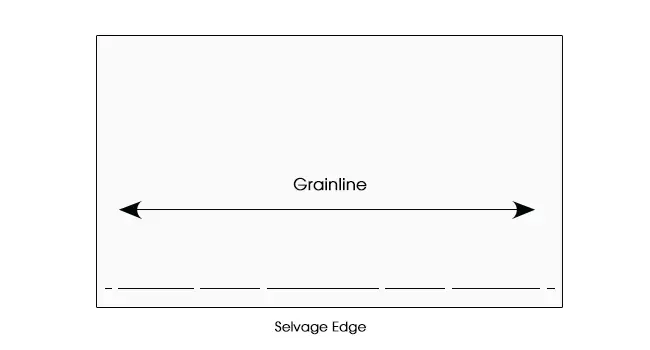
Grainline
It would be best if you took direction symbols with serious consideration. Fabric usually stretches more in one direction than in the perpendicular direction. The double-ended or grainline arrow shows the direction of the grain of the fabric. The direction of the arrowheads points to the direction of the least stretch on the fabric.
Note that the grainline should always be positioned parallel to the selvage. Measure from the top of the grainline across to the hem. Also, measure the bottom of the grainline to the hem. The two measurements should be equal.
You do not need to mark the grainline arrow on your fabric. Just make sure that you position your pattern pieces in the right direction. The grainline arrow shows how your fabric will hang as a garment following the grain of your fabric.
The direction of the grainline arrow is also important, especially when your fabric has stripes, plaids, or has a directional print. When working with fabrics with these prints, it would be very noticeable if you cut a pattern piece in a different direction.

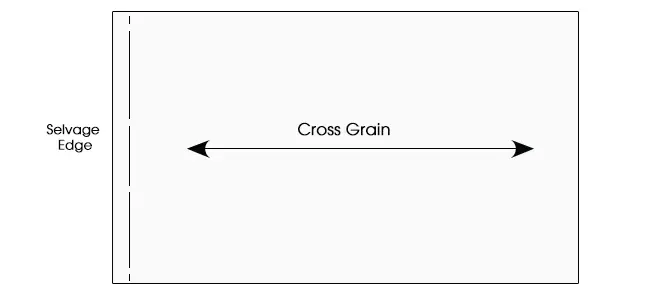
Cross Grain
Some pattern designers also use the double-headed arrow symbol to signify “stretch.” The symbol means the arrows should show the direction of the greatest stretch. It is essential to read the sewing pattern many times before proceeding with the cutting of fabric.
The cross-grain is at 90 degrees angle of the selvage. The cross-grain symbol is not commonly seen on pattern pieces. The grainline arrow is usually enough to indicate the direction of least stretch, and it is always parallel to the selvage.

Bias Cut
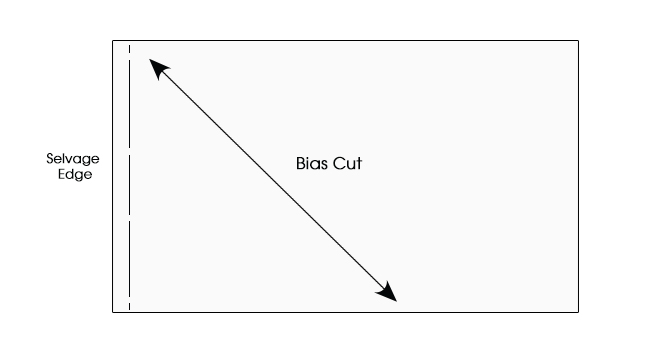
When you cut the fabric at a 45-degree angle of your selvage, it is called bias. The bias cut is often used for dresses or tops which do not have darting because there is more stretch and drape on this angle.
The bias cut symbol is represented by two lines at 45-degree angles from each other. One of the lines is a double-headed arrow.

Fold Line
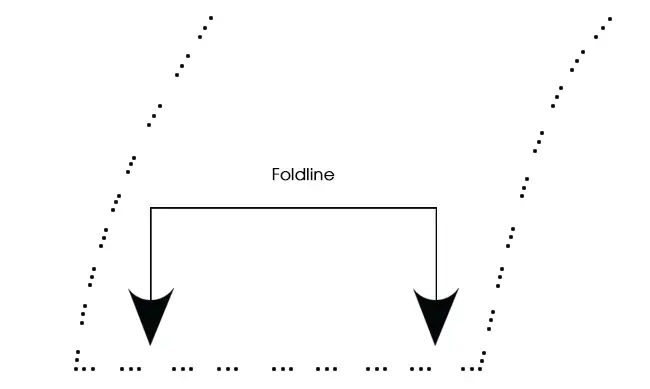
There are times when a sewing pattern does not have a fold line but has a grainline instead. You will need a fold line when your pattern piece is symmetrical and only needs to cut one piece. The fold line symbol is a double-headed arrow bent at both ends. The fold line symbol marks the edge of the pattern piece, which needs to be folded.
When you cut the fabric, the right side should be the mirror image of your left side. The folded edge will not have a seam allowance because there will be no seam, only a fold. Examples of garment parts that use the fold line are the center front of the dress or the center back of a shirt. You can also find the fold line symbol on sewing pattern pieces of collars or front and back of skirts.
There are more markings and pattern symbols on a sewing pattern other than those with arrows. Would you mind reading on to know more about them below?
What are the pattern symbols?
When you look at a sewing pattern, the variety of symbols can be overwhelming. But each of these markings is essential to be able to create garments the proper way. You should follow the guides and instructions that come with your sewing pattern to avoid wasting fabric when the wrong guides are cut.
The use of symbols in sewing patterns sometimes differs from one pattern maker to another. It is always best to read all the sewing pattern elements carefully, especially if you are just a newbie at sewing.

Cutting Lines
The lines that guide you where to cut on the sewing pattern are the cutting lines. When your pattern comes in one size only, the cutting lines are shown as a solid line. The lines where you need to sew on the fabric or the seam lines are shown as a dash or dotted lines.
The sewing pattern indicates the size of the seams in the instructions. When the pattern comes in many sizes, the numerous lines can be confusing. The markings for the cutting lines vary in style for each size. For example, a size 12 is a solid line, size 10 is a line of dashes, and size 8 is a line of dots. Usually, in this type of pattern, the seam line is not drawn.
Notches Diamond and triangle shapes are also familiar markings along the edges of a sewing pattern.
These symbols show the places where you need to connect two pattern pieces that should fit together.
Most sewing patterns use single notches to match front pattern pieces and double notches to connect back pattern pieces.

Bust, Waist, and Hip Indicators
Small circles with crossed lines at the center are used as bust, waist, and hip indicators in sewing patterns. You can find them at points on the pattern pieces where you need specific body measurements. Many patterns give the actual circumference measurements along with these symbols. Make sure to read the details on your sewing pattern, such as these symbols. You will be sure that the finished garment measurements will be similar to your bust, waist, and hip measurements.

Squares, circles, and other shapes
You can also find different small shapes such as squares, circles, etc., scattered on your sewing pattern pieces. They are usually located at the necklines or armholes of a pattern. The purpose of these small shapes is to indicate the points where you should match two pieces of the pattern, such as an armhole, into a sleeve.

Lengthen/Shorten Lines
Sewing patterns are created with a certain height in mind. You may be shorter or taller than the projected height, so you have to adjust the length.
A sewing pattern usually has two horizontal, parallel lines to guide you to shorten or lengthen the pattern to suit your measurements. It would be best to follow the lengthen or shorten lines indicated by the pattern designer than making your own. Changing the pattern by yourself may affect the overall look of your finished garment.

Buttonholes and Buttons
The buttonhole symbol is in its actual location on a sewing pattern. You can identify it by a line that is shaped like an upright or a horizontal capital “I.” You can also find the location of the button along the Line represented by an X.

Dart Lines
You can find diamond-shaped figures or two lines coming from one point on the pattern. These symbols are called dart lines.
Dart lines are found on the front or back bodice to shape the fabric near the waist and bust. It is also useful for skirt patterns to show fabric from the waist to the hips.

Tucks
Tucks are formed when you bring two points together to sew a line parallel to the fold line.

Gathering Lines
Gathering lines in the pattern are usually shown as either a straight line or a wavy line between two points. You can use the longest stitch on your machine to gather fabric and sew between the two points.
You get the measurement of the amount of fabric to gather from the sewing instructions.
What are the little triangles on sewing patterns?
The little triangle markings on the sewing pattern are called notches. They are symbols that help you match your pattern pieces.
Cutting these notches may be a little daunting. Following the pattern directions right will stop you from connecting your pieces upside down or back to front. It will prevent you from sewing your pieces wrongly that you would frustratingly need to undo them later.
Sewing notches can be represented by a triangle pointing out, pointing in, or a diamond pointing in both directions. You can find them as an outline or solid shapes. You can also find the single, double, or even triple. Pattern makers vary in using these notches.
There are two ways of cutting the notches; cut them in or out. But there is no right or wrong way to do it. Do what you think would work best for you. Some sewists suggest always cut outwards to lessen the risk of making a mistake. Also, when you cut it too far in, it may weaken the seam.
You can find sewing notch cutters that can accurately cut ¼ inch notches on the pattern paper or fabric. You can also use small scissors to cut the notches on fabrics as there is a strong possibility of cutting too far in the seam with large scissors.
When cutting your notches, make sure that you are consistent with the method that you use so that your pieces are sure to match up.

Leave a Reply